Hyper-V is a very capable hypervisor for use today yet there are three ways to use it. I blogged about these three ways, but the key takeaway is that the three options are:
- Having the Hyper-V role on a Windows Server 2012 R2 system (full installation)
- Having the Hyper-V role on a Windows Server 2012 R2 system (core installation)
- Using the Free Hyper-V Server 2012 R2
In this post, let’s focus on the free Hyper-V Server 2012 R2 and its installation. Before you get too far along, be sure to check the Hyper-V system requirements to use the free hypervisor. The first step is to download Hyper-V Server 2012 R2, which you can do from the TechNet Evaluation Center. Once you have download the .ISO of Hyper-V Server 2012, let’s go through the installation process.
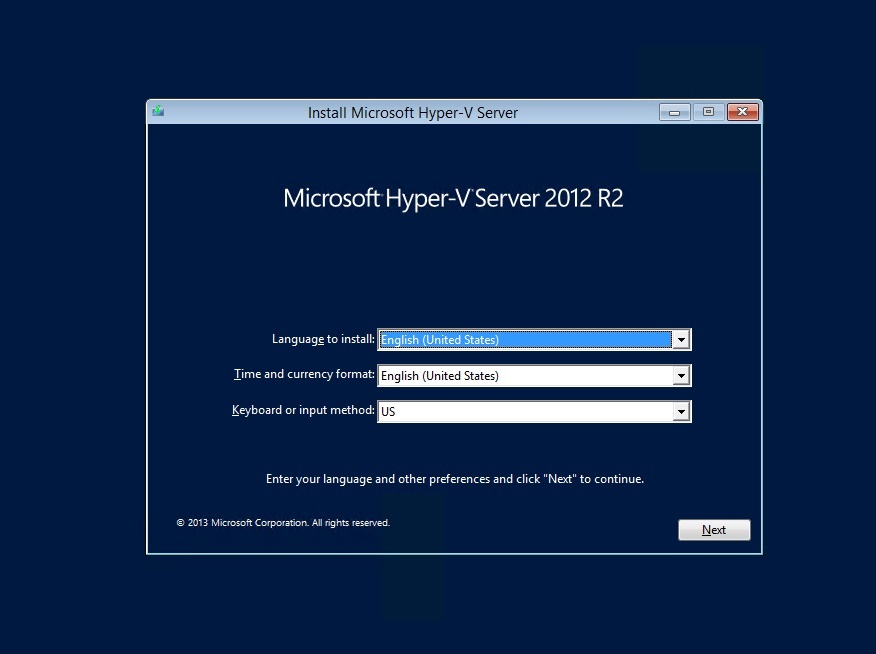
Once the .ISO is burned to a DVD, you can boot the computer or server up on the new operating system. If you see this screen where you can select your language, keyboard and numerical formats you are starting off well:
After the localization is selected, the Hyper-V Server installation wizard will start the installation in the selected configuration (languages, keyboard in particular). Push the install now button to start the specific part of the installation process:

The first step of the installation process is to accept the license agreement for Hyper-V Server 2012 R2:

The next step of the installation wizard specifies whether a new installation (Custom) or an upgrade is to be performed. I always use the Custom option for new installations. If you have taken a proper backup of a Hyper-V Server 2012 (not the R2 edition) you can try the Upgrade option. For this blog post, we’ll stick with the Custom option:

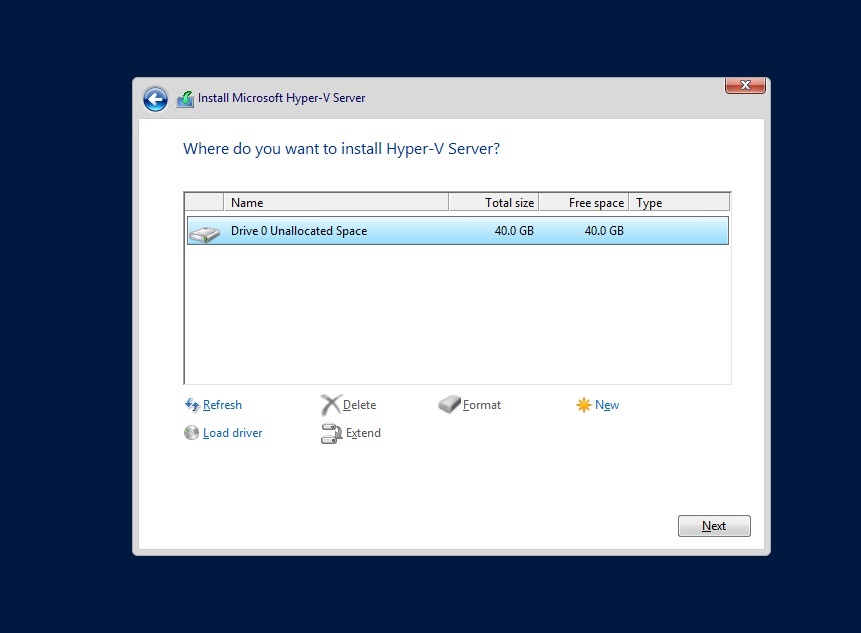
The next decision is very important in the installation process. This will tell the Hyper-V Server 2012 R2 installation process where (from a disk storage perspective) the installation of the hypervisor will occur. In this example, I have a computer with a 40 GB drive installed. There is nothing on the hard drive, and it’s important to note that the installation process will overwrite the contents of the drive. The option to install on this new drive is shown below:
After that, the Hyper-V Server 2012 R2 installer will prepare that drive and make the new Hyper-V host ready to boot up on its own:

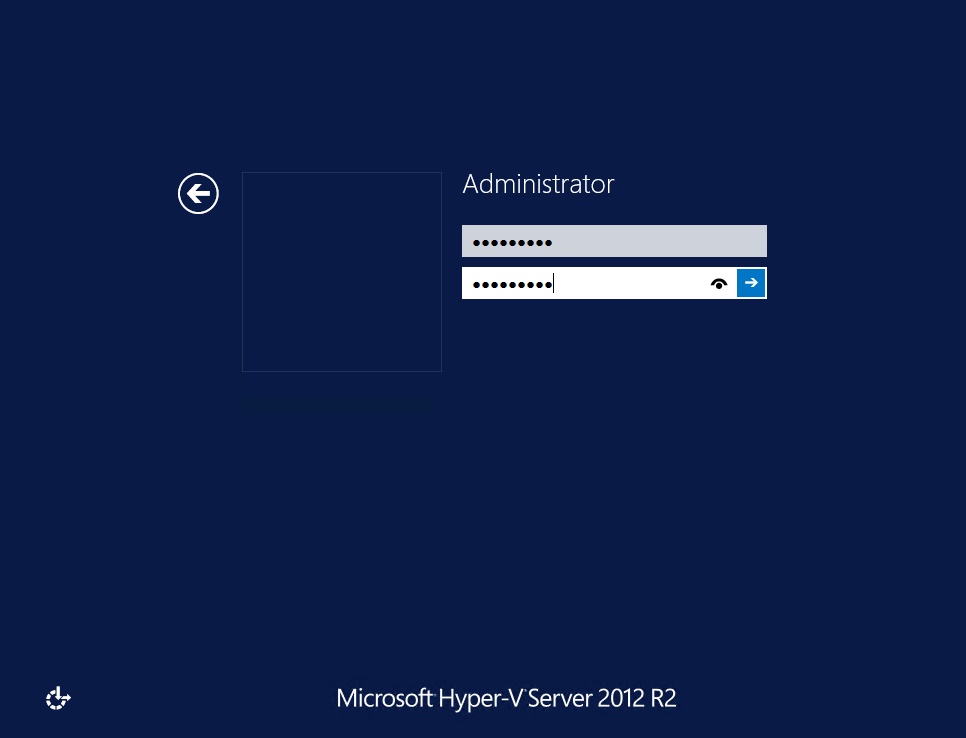
Once the installation is complete, the Hyper-V host is almost ready. The first step after the installation is complete is to set an Administrator password. This is the local computer’s Administrator user. You can still join a Hyper-V host to an Active Directory domain, but this credential will be used for the local system user called Administrator:

The password you select must meet the base password complexity requirements for modern Windows environments. And you enter the password as shown below (don’t loose it!):
Once the password is selected, the Hyper-V Server 2012 R2 is ready to go! The first screen you’ll see is the console of the Hyper-V host and there a special script (sconfig) runs for base administration (set computer name, reboot, networking, etc.) as well as a command prompt:

With the installation complete, there are a number of next steps you can complete. For most environments, the next logical step is to complete the following steps in this order:
- Set the TCP/IP network address
- Set the DNS configuration
- Address Windows Firewall settings
- Change the computer name
- Perform Windows Updates
- Join an Active Directory domain
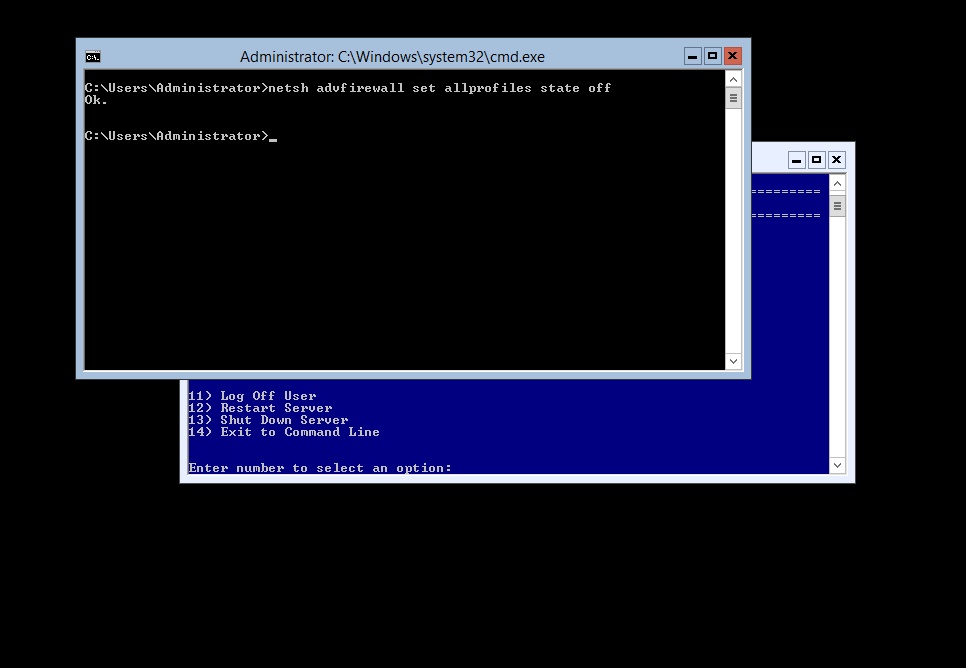
These are base configuration items, and depend entirely on what you want to do with the Hyper-V host. One command I have however committed to memory is to address Windows Firewall settings. For lab usage, I don’t use Windows Firewall and this command (in the command prompt screen) will disable all Windows Firewall configurations as well as what the successful command looks like:
netsh advfirewall set allprofiles state off
netsh advfirewall set allprofiles state off
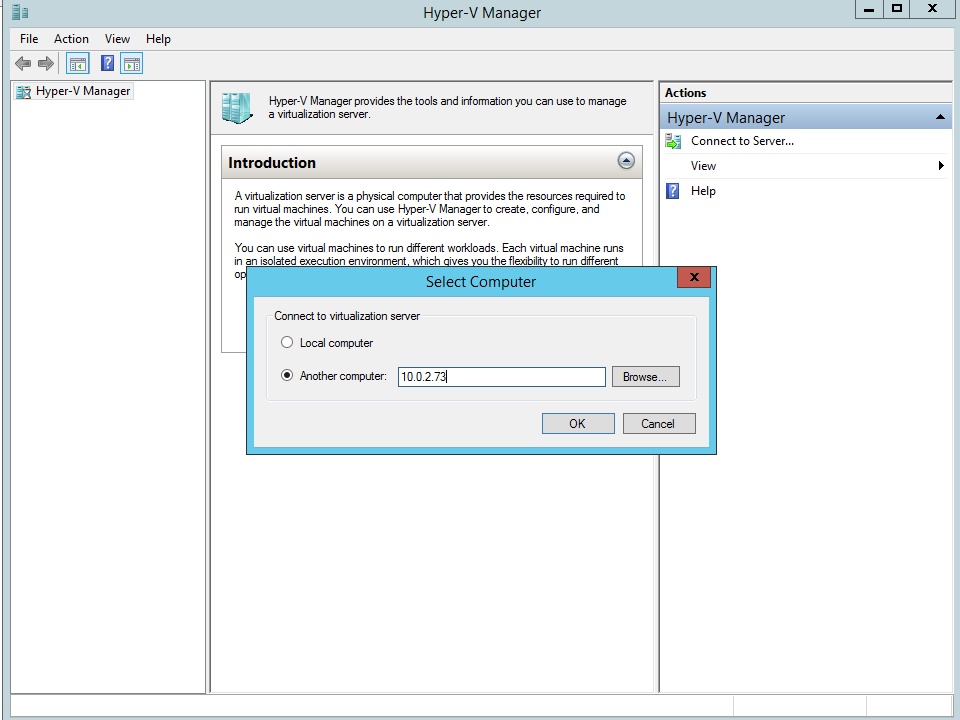
There may be one or more reboots of the Hyper-V host required for each of the steps above. The next step with Hyper-V Server 2012 is to connect remotely via Hyper-V Manager and start running virtual machines if all of your environment pre-requisites are complete. Hyper-V Manager can be installed on almost any Windows system (for Windows 7 follow these steps for Windows Server system add the Hyper-V Management Tools). From Hyper-V Manager the Hyper-V host is added below:
At this point, you are now able to create virtual machines easily on the Hyper-V host. It’s important to make sure you are good with the other aspects of remote management since we are using Hyper-V Server 2012 R2 with no User Interface on the console. The most common step is to connect remotely with Server Manager on another Windows Server 2012 R2 system.

Have you used the free Hyper-V Server 2012 R2? If so, what have you learned about this option compared to other ways Hyper-V can exist? Share your experiences below.
Comments
Post a Comment