VMWare Horizon View 7 is used for Desktop Virtualization. It can be used to create Desktop Pools to offer Floating and Dedicated Desktops to end users. It delivers Virtual Desktops and Applications through a single console. New version of VMWare Horizon 7 is more stable because of Blast Extreme Protocol, Instant Clone, etc.
Pre-requisites:
- Domain Controller
- VMWare ESXi 6 as Hypervisor
- Domain User with delegated permissions of Domain Administrator
- Download VMWare Horizon 7 View Connection Server.
- VMWare Horizon 7 License: You’ll get the License when you register and download VMWare Horizon 7
Topic Sequence
- How to install VMWare Horizon View 7 Connection Server
- How to install VMWare Horizon 7 Composer Server
- How to add vCenter Server and Composer Server in Connection Server.
- Steps to add VMWare Horizon Agent
- How to create Virtual Desktop Pool
Steps to install VMWare Horizon View 7 Connection Server
Step 1:
Download the executable of VMWare Horizon View 7 Connection Server and run the same.
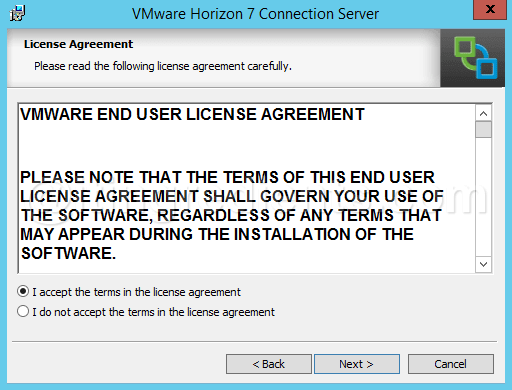
Click on next to continue the installation.
Accept the agreement and click on next to continue.
Step 2:
Define the destination folder or continue with the default path and click on next to continue.
Define the destination folder or continue with the default path and click on next to continue.
Step 3:
Select the type of VMWare Horizon View 7 connection server instance you want to install.
For this practical, we’ll select “Horizon 7 Standard Server”.
Select the type of VMWare Horizon View 7 connection server instance you want to install.
For this practical, we’ll select “Horizon 7 Standard Server”.
Type of Horizon 7 Connection servers
- Standard Server: Standard Server is a first instance if you are planning to create the group of Servers. It is used for the Management of Horizon 7 Virtual Desktops and Applications. It is the single point of management to define the User enrollment and permissions.
- Replica Server: It acts like a replica of the Standard Server. It is primarily used to provide redundancy and high availability. It is required if Standard Server is not available. It shares common database.
- Security Server: It is primarily deployed in DMZ zone. It provides secure environment for external users to access their Virtual Desktops and Applications. It is required to be connected to either Standard or Replica Server.
- Enrollment Server: It is used for True SSO i.e. Single Sign On.
Select the IP Protocol version you want to use to configure VMWare Horizon 7 Connection Server. For this practical we’ll select IPv4. Click on next to continue.
Step 4:
Specify the data recovery password. It is required to recover the backup.
Once specified, click on next to continue.
Specify the data recovery password. It is required to recover the backup.
Once specified, click on next to continue.
Step 5:
While configuring VMWare Horizon View 7 some of the incoming TCP ports are required to be allowed. Select the option “Configure Windows Firewall Automatically” and it would allow all the required ports in the Firewall or select an option “Do not Configure Windows Firewall” if you want to configure Firewall manually.
While configuring VMWare Horizon View 7 some of the incoming TCP ports are required to be allowed. Select the option “Configure Windows Firewall Automatically” and it would allow all the required ports in the Firewall or select an option “Do not Configure Windows Firewall” if you want to configure Firewall manually.
Step 6:
You need to be authorized and have local Administrators access on the Server on which you are installing VMWare Horizon 7 Connection Server.
For this practical, we have delegated Domain Administrator rights to Domain User TU1. Please ensure that you have proper permissions defined before starting the installation process. The authorized user would be acted as an Horizon View Administrator.
Step 7:
To participate in the user experience improvement program check the box and give the required details. For this practical, we’ll skip the same and click on next to continue.
To participate in the user experience improvement program check the box and give the required details. For this practical, we’ll skip the same and click on next to continue.
Step 8:
Click on Install to begin the installation of VMWare Horizon 7 Installation.
Once the installation is finished, click on Finish to close the console.
Click on Install to begin the installation of VMWare Horizon 7 Installation.
Once the installation is finished, click on Finish to close the console.
Step 9:
Once the installation is successfully completed, an icon of VMWare Horizon 7 would be created on the Desktop. Double click on the icon to start the administration and management of Horizon View. To configure the VMWare Horizon 7 license, expand the view configuration and select “Product Licensing and Usage” and then click on “Edit License”.
Once the installation is successfully completed, an icon of VMWare Horizon 7 would be created on the Desktop. Double click on the icon to start the administration and management of Horizon View. To configure the VMWare Horizon 7 license, expand the view configuration and select “Product Licensing and Usage” and then click on “Edit License”.
Step 10:
Specify the License key and click on OK to configure Licensing. Once the Horizon View License is configure successfully, it would show License expiration date and the features that are enabled.
Specify the License key and click on OK to configure Licensing. Once the Horizon View License is configure successfully, it would show License expiration date and the features that are enabled.
Step 11:
Click on Dashboard to check the health of all the View Components that you have installed. It would turn them in Red color in case of any issues.
Click on Dashboard to check the health of all the View Components that you have installed. It would turn them in Red color in case of any issues.
Please ensure you install .Net 3.5 SP1 before we start with the installation of VMWare View Composer
Download the View installer and run the same.
On the installer window, click on next to continue.
Step 12:
Accept the End User License Agreement and then click on next to continue.
Click on change to define an alternate destination folder else click on next to continue with the default location.
Accept the End User License Agreement and then click on next to continue.
Click on change to define an alternate destination folder else click on next to continue with the default location.
Step 13:
On the Database Information window, specify information of ODBC Setup name and ODBC Data Source Administrator and Administrator password.
If you have not created ODBC DSN setup then follow the steps given below from Step 4 to Step 6, else move directly to Step 7.
On the Database Information window, specify information of ODBC Setup name and ODBC Data Source Administrator and Administrator password.
If you have not created ODBC DSN setup then follow the steps given below from Step 4 to Step 6, else move directly to Step 7.
Step 14:
Click on “System DSN” tab and click on Add.
Click on “System DSN” tab and click on Add.
Step 15:
Select “SQL Server Native Client” and then click on Finish.
Specify the “Data Source” name, description and name of Database Server.
Specify SQL Server Authentication, we’ll use SA (SQL Administrator) to authenticate.
Click on next to continue.
Select “SQL Server Native Client” and then click on Finish.
Specify the “Data Source” name, description and name of Database Server.
Specify SQL Server Authentication, we’ll use SA (SQL Administrator) to authenticate.
Click on next to continue.
Step 16:
Check the box “Change the default database to” and select the database that you have created.
For this practical, we have already created Database with the name of HCSDB.
Click on Next and then click on Finish.
Test the data source to confirm that it’s working fine without any issue.
Check the box “Change the default database to” and select the database that you have created.
For this practical, we have already created Database with the name of HCSDB.
Click on Next and then click on Finish.
Test the data source to confirm that it’s working fine without any issue.
Step 17:
Specify the Web Access port, default port is 18443. You can assign any other port number if you want. However for this practical, we’ll use the default port number.
Specify the Web Access port, default port is 18443. You can assign any other port number if you want. However for this practical, we’ll use the default port number.
Step 18:
Click on install to install VMWare View Composer 7.
Click on install to install VMWare View Composer 7.
Step 19:
Once installation is completed, click on Finish to close the wizard and then restart the Server to complete the installation steps.
Steps to add vCenter Server and VMWare Composer in Horizon View Connection Server
Step 20:
Open VMWare Horizon 7 Administrator console.
Expand View Configuration and select Servers.
Select VCS (vCenter Server) and click on Add.
Open VMWare Horizon 7 Administrator console.
Expand View Configuration and select Servers.
Select VCS (vCenter Server) and click on Add.
Step 21:
Type VCS address, user name and Password.
You can also add Description for your reference.
Default port used is 443, if you have used any different port while configuring VCS then please mention the same.
Click on next to continue.
Type VCS address, user name and Password.
You can also add Description for your reference.
Default port used is 443, if you have used any different port while configuring VCS then please mention the same.
Click on next to continue.
Step 22:
You would see a warning message related to Certificate.
Click on View Certificate and then click on Accept to accept the Certificate.
You would see a warning message related to Certificate.
Click on View Certificate and then click on Accept to accept the Certificate.
Step 23:
We’ll see three types of settings as an option.
a) Do not use View Composer: Use this option if you don’t want to use Linked Clone Desktop Pools
b) View Composer co-installed with vCenter: Use this option, if you have hosted Computer and VCS on the same host.
c) Standalone view Composer: Use this option if you have dedicated Composer Server. We’ll use this option as we have installed it on different box. Specify Composer server name user name and password. Default port number is 18443.
Click on next to continue.
Step 24:
Click on View Certificate if you see warning message “Invalid Certificate Detected”
Click on Accept to accept the certificate.
Click on View Certificate if you see warning message “Invalid Certificate Detected”
Click on Accept to accept the certificate.
Step 25:
To specify the Domain name, click on Add -> Specify Full Domain Name along with User name and Password.
For this practical, we have defined Domain Name as saikrishna.com
To specify the Domain name, click on Add -> Specify Full Domain Name along with User name and Password.
For this practical, we have defined Domain Name as saikrishna.com
Step 26:
On the Storage window, we’ll select the default options and click on next to continue.
Reclaim VM Disk Space: This option is used to reclaim all the unused disk space which is left over after deleted files, etc. It initiates when the total space exceeds the defined threshold.
On the Storage window, we’ll select the default options and click on next to continue.
Reclaim VM Disk Space: This option is used to reclaim all the unused disk space which is left over after deleted files, etc. It initiates when the total space exceeds the defined threshold.
Step 27:
Review all the settings and then click on Finish to add VCS and VMWare Composer in Horizon View 7 Connection Server.
Install VMWare Horizon Agent
Step 1#
Insert the DVD of VMWare Horizon View on the newly created Virtual Machine or download the VMWare Horizon Agent from VMWare Website and start the Agent installation.
Step 2#
On the Welcome installation Wizard, click on next to continue.
Step 3#
Read the VMWare End User License Agreement and if you agree then click on “I accept the terms in the licence agreement” and click on next.
Read the VMWare End User License Agreement and if you agree then click on “I accept the terms in the licence agreement” and click on next.
Step 4#
We have two options to continue the installation either we can configure Remote Desktop Sesion Host role on the Virtual Machine and then restart the VM.
We have two options to continue the installation either we can configure Remote Desktop Sesion Host role on the Virtual Machine and then restart the VM.
Alternatively we can check the box “Install VMWare Horizon Agent in ‘desktop mode’“. For this practical, we’ll select the option and click on next to continue.
Step 5#
Out of IPv4 and IPv6, select the protocol that you want VMware Horizon Agent to use while communicating and establishing all the connection. For this practical, we’ll select IPv4.
Out of IPv4 and IPv6, select the protocol that you want VMware Horizon Agent to use while communicating and establishing all the connection. For this practical, we’ll select IPv4.
Step 6#
Out of all the features available, select the features that you want to be available or installed on the Virtual Machine.
Out of all the features available, select the features that you want to be available or installed on the Virtual Machine.
For this article, we’ll go with the default options and click on next to continue.
Step 7#
VMWare Horizon Agent required the Remote Desktop support to be turned on and Firewall exception for RDP Port number 3389 would be automatically created. Select the option “Enable the Remote Desktop capability on this computer”.
VMWare Horizon Agent required the Remote Desktop support to be turned on and Firewall exception for RDP Port number 3389 would be automatically created. Select the option “Enable the Remote Desktop capability on this computer”.
Step 8#
On “Ready to Install the Program“, click on Install and it would start the installation process of VMWare Horizon Agent.
On “Ready to Install the Program“, click on Install and it would start the installation process of VMWare Horizon Agent.
Agent would be installed in C:\Program Files\VMWare\VMware View\Agent\ folder.
Step 9#
Once the installation is completed, click on Finish to close the console and then restart the Virtual Machine to complete the installation process.
Create Desktop Pool in VMWare View
Step 1#
Open VMWare Horizon View Console and then click on Desktop Pools and then click on Add to add new Desktop Pool.
Step 2#
We’ll see three types of “Desktop Pool” i.e. Automated Desktop Pool, Manual Desktop Pool and RDS Desktop Pool.
Steps to install and configure vCenter Server
Automated Desktop Pool: It used vCenter Server template or Virtual Machine snapshot to generate new VMs. Virtual Machine template or Snapshot is required for Automated Desktop Pool
Manual Desktop Pool: It supports any kind of vCenter Server Virtual Machine or Physical Machines on which agent is deployed.
RDS Desktop Pool: It is used to provide RDS sessions of Virtual Machines or Physical Machines. It’s kind of taking remote of your Desktop.
For this article, we’ll select an option “Automated Desktop Pool” and click on next to continue.
Step 3#
We’ll see two options for “User Assignment” i.e. Dedicated or Floating.
Dedicated: It’s more like an Assigned VMs, i.e. One O One mapping of Virtual Machines and Users. Every time user logs in they get similar Virtual Machine and all their data remains persistent.
Floating: It’s a pool of VMs. It is more prominent in environments where Dedicated Virtual Machines are not required. VMs are assigned on first come first serve basis. Once the user logs Off from the Desktop then it is available for another User.
For this practical, we’ll select Floating and then click on next to continue.
Step 4#
Now we need to define the type of Virtual Machine that we are going to create. We’ll see an option of Full Virtual Machines, View Composer linked clones and Instant Clone.
Full Virtual Machines: A full VM is created through the VM template created in the vCenter Server. You can install all the required applications and software before we convert or create a VM template.
View Composer Linked Clones: As the name states, linked clones share the same base image. Pre-requisite that we should have Composer and vCenter Servers added to Connection Server.
Instant Clones: Instant Clones also share the same base image and they use less storage space. They always stay power-on and get recreated from current published image after logoff.
For this practical, we’ll select Full Virtual Machines and then click on next to continue.
Step 5#
On the “Desktop Pool Identification” window, define the unique ID and Display name and then click on next to continue.
Step 6#
On the “Desktop Pool Settings”, change the settings as per your requirement. For this practical, we’ll go with the default settings.
Step 7#
On the Provisioning settings, use the option “Use a naming pattern” to define the naming pattern. For this example, we’ll define the naming pattern as Win10-{n}. In this example, n would automatically replaced by the number.
And select the option “Provision all machines up-front”. Also define the total number of Virtual Machines that you want to create.
As we want 3 VMs to be created therefore we have defined 3.
Step 8#
For the Storage policy, we’ll select an option “Do not use VMWare Virtual SAN”. As we don’t have Virtual SAN configured on our vCenter Sever.
Step 9#
On the vCenter Settings window. To create Desktop Pool, select the VM Template that you would like to use to create multiple Virtual machines. Also select, VM Folder, Host or Cluster on which VM would be hosted, Resource Pool if you have created any and Datastores in which these newly created VMs would be hosted.
Step 10#
On the Advanced Storage Options, let’s go with the default options and click on next to continue.
Step 11#
Select the option “Use this customization specification” and click on next to continue.
Step 12#
Review all the settings that we have selected and click on Finish if no changes are required.
Step 13#
Under Catalog, in Desktop Pool we can see ID1 is created successfully. Double click on ID1 and click on Inventory tab to see all newly created Automated Virtual Machines.
Assign Desktop to User
Depending on the type of Desktop Pool you have created, Virtual Machines would be assigned to user. In case of Floating Desktop Pool, VMs would only be assigned for the duration while user is logged in. When user log off that VM would be available for another user. However in case of Dedicated Desktop Pool, VM is dedicated to the user. User would get the same machine whenever they login. Let’s start with the steps to assign a Desktop to a user.
Step 1#
Open VMWare Horizon View 7 console, in Inventory select Users and Groups. Click Entitlements and then select “Add Desktop Entitlement” to assign a Machine to User. We can select “Add Application Entitlement” if we want an Application to be assigned to User.
Step 2#
In the “Add Desktop Entitlement” window, Select the Domain and type the Name of User or Group whom you want to assign the Desktop and then click on Find. We have already created a Security Group in Active Directory with the name of ProG. Select the name of Group in the result and then click on Next to continue.
Active Directory User Account Management
Step 3#
Select the Desktop Pool to which you want access to be granted. Click on Finish to close the wizard.
Once added, you can see the User name or the Group whom access is granted.
Nice Article keep it up👌👌
ReplyDeletegood work simple steps nice article
ReplyDeleteGood work👍 👍
ReplyDelete